Navigating the Time Machine: Understanding and Utilizing Windows 10 System Restore Points
Related Articles: Navigating the Time Machine: Understanding and Utilizing Windows 10 System Restore Points
Introduction
In this auspicious occasion, we are delighted to delve into the intriguing topic related to Navigating the Time Machine: Understanding and Utilizing Windows 10 System Restore Points. Let’s weave interesting information and offer fresh perspectives to the readers.
Table of Content
- 1 Related Articles: Navigating the Time Machine: Understanding and Utilizing Windows 10 System Restore Points
- 2 Introduction
- 3 Navigating the Time Machine: Understanding and Utilizing Windows 10 System Restore Points
- 3.1 Unveiling the Mechanics: How System Restore Points Function
- 3.2 Recognizing the Importance: The Benefits of Utilizing System Restore Points
- 3.3 Navigating the Interface: Accessing and Managing System Restore Points
- 3.4 Understanding the Process: Initiating a System Restore
- 3.5 Addressing Potential Issues: Common FAQs
- 3.6 Enhancing System Protection: Tips for Effective Utilization
- 3.7 Conclusion: Embracing the Safety Net of System Restore Points
- 4 Closure
Navigating the Time Machine: Understanding and Utilizing Windows 10 System Restore Points
:format(webp)/cdn.vox-cdn.com/uploads/chorus_asset/file/19993846/restore_point_5__1_.png)
In the ever-evolving landscape of computing, unforeseen issues and software glitches can arise, potentially disrupting your workflow and data integrity. Windows 10, with its inherent focus on user experience and system stability, offers a powerful tool to mitigate these challenges: System Restore Points. These snapshots of your system’s configuration act as a safety net, allowing you to revert to a previous state, effectively undoing unwanted changes and restoring your computer to a functional condition.
Unveiling the Mechanics: How System Restore Points Function
System Restore Points are essentially checkpoints, capturing the state of your operating system, installed applications, and system files at a specific moment. When a system restore is initiated, Windows 10 uses these checkpoints to roll back your computer to the chosen point in time, effectively erasing any changes made after that point. This process can be likened to a time machine, allowing you to rewind your computer to a previously stable state.
Recognizing the Importance: The Benefits of Utilizing System Restore Points
The value of System Restore Points lies in their ability to address a range of scenarios, providing a safety net for your digital life:
- Undoing Unwanted Changes: Accidental software installations, driver updates, or registry modifications can sometimes lead to system instability. System Restore Points offer a way to undo these changes, returning your system to a functional state.
- Recovering from Malware Infections: Malicious software can wreak havoc on your computer, corrupting files and compromising your data. System Restore Points can help you recover from these infections by reverting your system to a clean state before the malware took hold.
- Troubleshooting Software Issues: If a newly installed program or update causes conflicts, System Restore Points allow you to revert to a state where the issue did not exist, eliminating the need for extensive troubleshooting.
- Preserving Data Integrity: In cases of system crashes or hardware failures, System Restore Points can help preserve your data by restoring your system to a working state.
Navigating the Interface: Accessing and Managing System Restore Points
Windows 10 provides a user-friendly interface for accessing and managing System Restore Points:
1. Through the Control Panel:
- Navigate to the Control Panel (accessible through the search bar).
- Select "System and Security" and then "System."
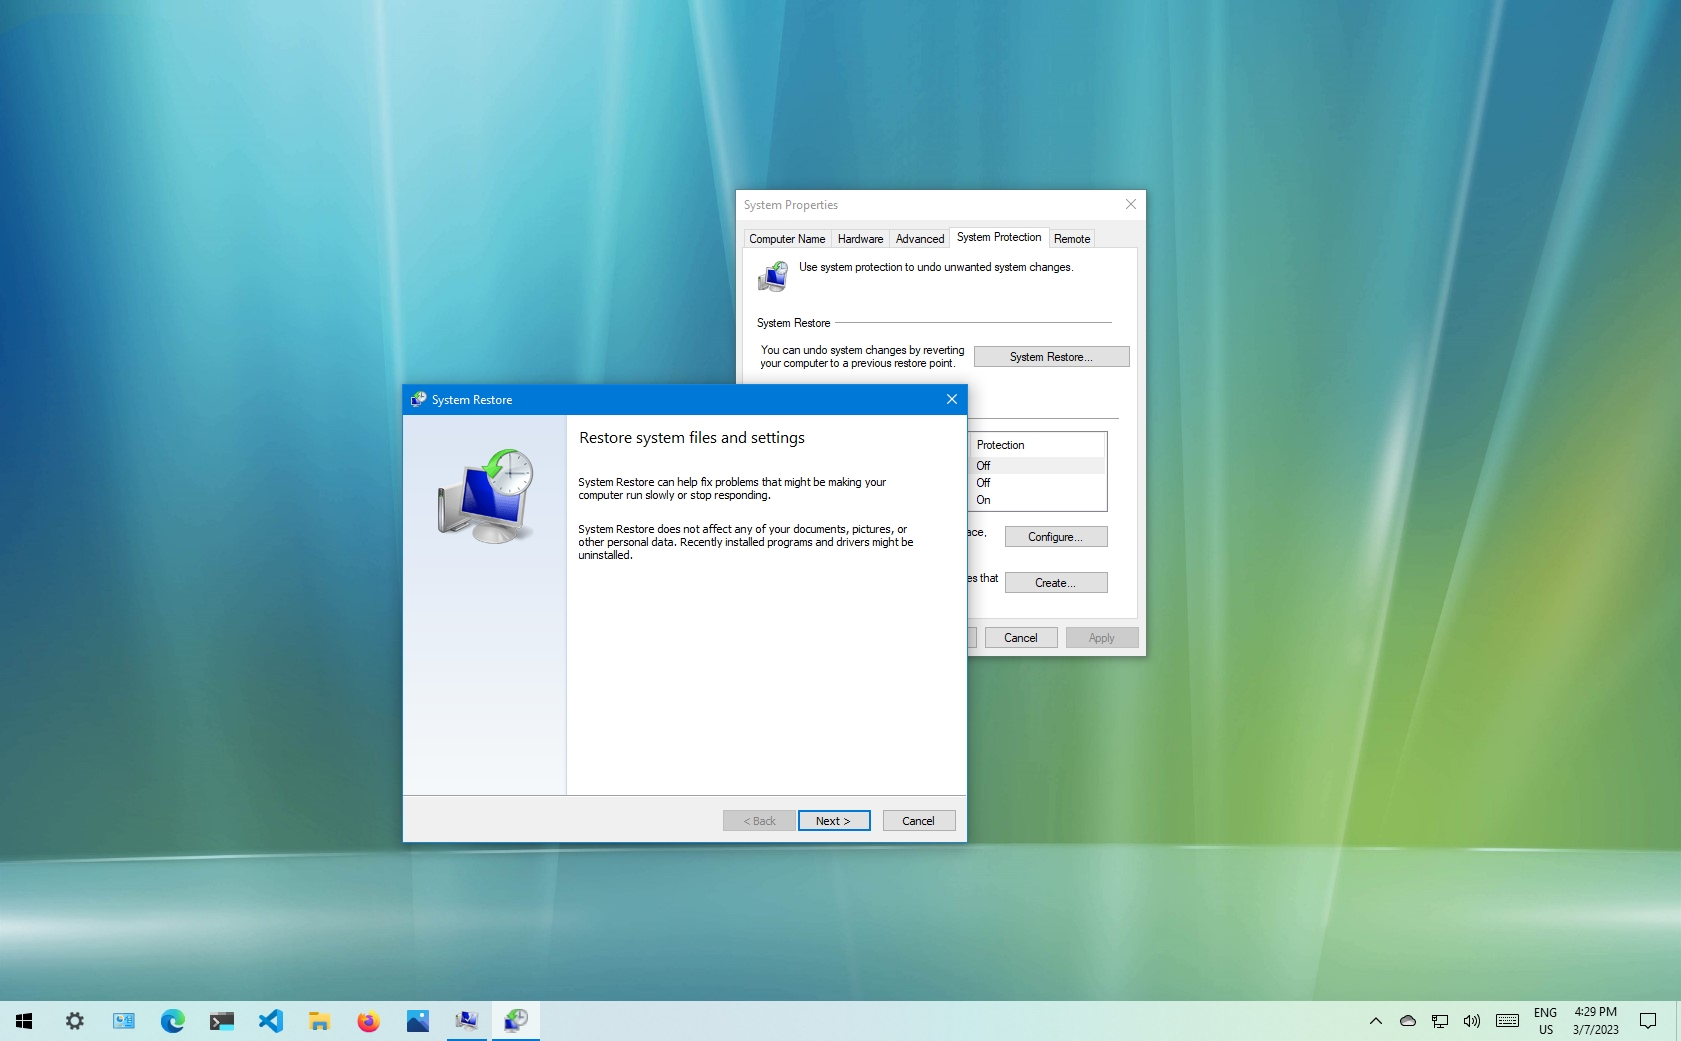
- Click on "System Protection" in the left-hand pane.
- The "System Protection" window will display a list of drives with their respective protection settings.
- Select the drive you wish to manage and click "Configure."
- This will allow you to enable or disable system protection and manage the disk space allocated for restore points.
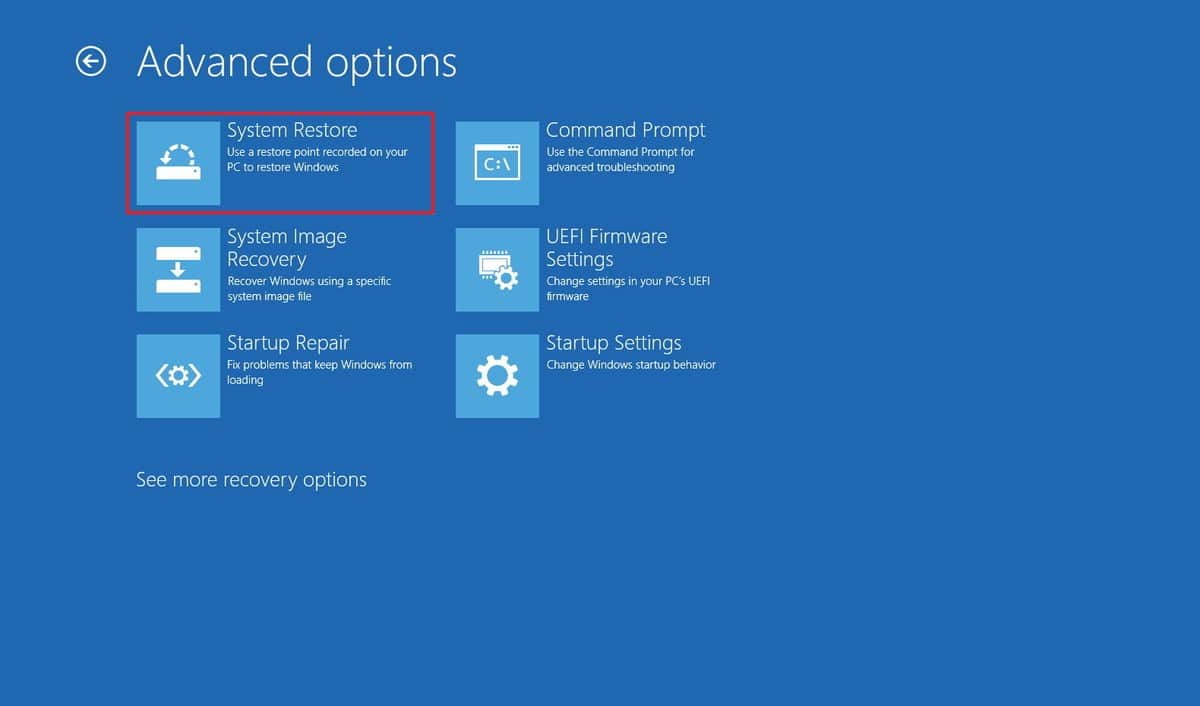
2. Through the Settings App:
- Open the Settings app (accessible through the Start Menu).
- Navigate to "Update & Security" and then "Recovery."
- Under "Recovery Options," click "Open System Restore."
- This will open the System Restore window, where you can choose a restore point and initiate the process.
Understanding the Process: Initiating a System Restore
The process of initiating a system restore is straightforward:
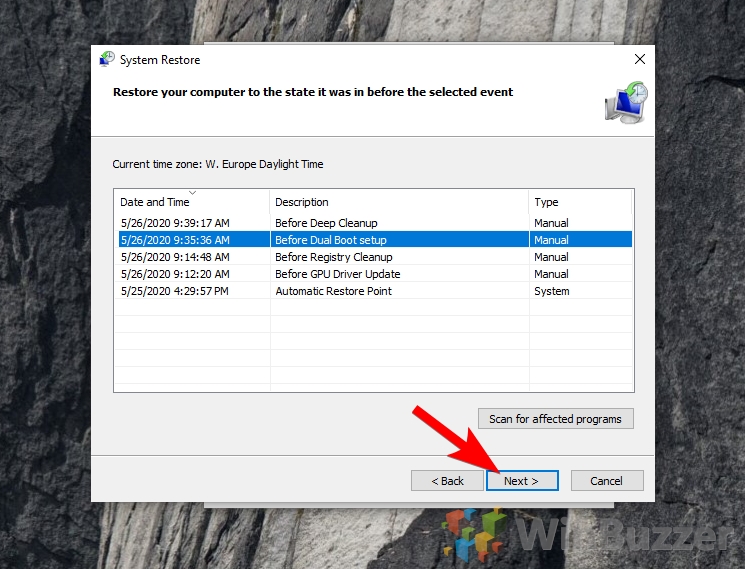
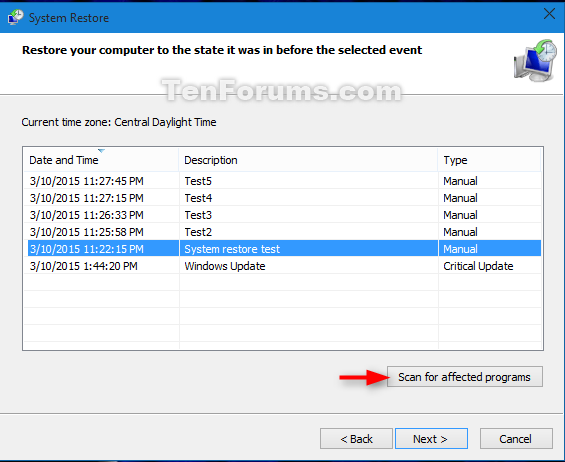
- Select a Restore Point: Browse through the available restore points, choosing the one closest to the time when your system was functioning correctly.
- Initiate the Restoration: Click "Next" to proceed with the restoration process.
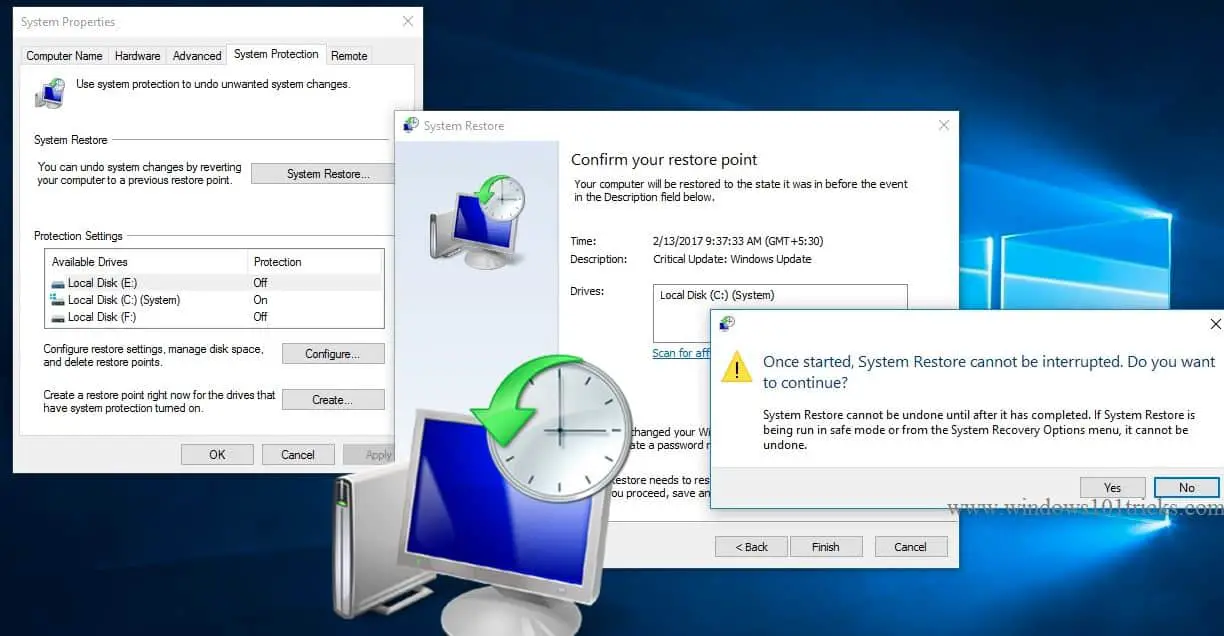
- Confirm the Action: Carefully review the chosen restore point and confirm your action.
- Initiate the Reboot: The system will restart, and the restore process will commence.
Addressing Potential Issues: Common FAQs
1. What happens to my data during a system restore?
System Restore primarily focuses on restoring system files and settings. It does not affect your personal data, such as documents, photos, or music. However, it’s always advisable to back up your important data regularly to ensure its safety.
2. Can I restore my system to a point earlier than the oldest available restore point?
No, System Restore can only restore your system to a point in time for which a restore point exists. It cannot revert your system to a state before the oldest available restore point.
3. How much disk space do restore points consume?
The amount of disk space consumed by restore points depends on your system’s configuration and the frequency of automatic point creation. You can manage the disk space allocated for restore points through the "System Protection" settings.
4. Can I delete restore points manually?
Yes, you can delete restore points manually through the "System Protection" settings. However, it’s advisable to keep at least one restore point available for potential recovery needs.
5. Does System Restore affect my installed applications?
System Restore can affect the installed applications depending on the chosen restore point. If the chosen restore point predates the installation of a particular application, that application may be removed during the restore process.
6. What if System Restore fails to complete the process?
If System Restore fails to complete the process, you can try restarting your computer and attempting the restore again. If the issue persists, you may need to seek professional assistance.
Enhancing System Protection: Tips for Effective Utilization
1. Schedule Automatic Restore Point Creation: Windows 10 automatically creates restore points before significant system events, such as software installations or updates. You can customize the frequency of automatic point creation through the "System Protection" settings.
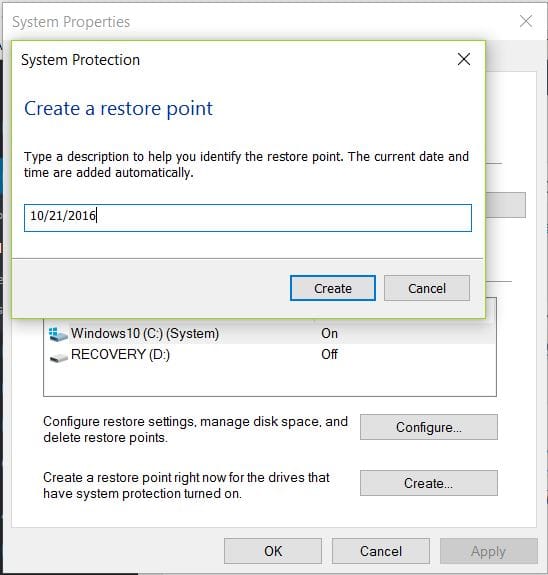
2. Create Manual Restore Points: Before making major system changes, such as installing new software or updating drivers, consider creating a manual restore point. This will provide a safety net in case the changes lead to unexpected issues.
3. Monitor Disk Space Usage: Regularly monitor the disk space consumed by restore points and manage the allocated space accordingly. You can delete older restore points to free up disk space.
4. Consider System Image Backups: While System Restore is a valuable tool, it’s not a complete backup solution. Consider creating system image backups regularly to ensure a comprehensive backup of your entire system, including your data.
5. Stay Informed about System Updates: Keep your system up to date with the latest Windows updates to ensure optimal stability and security. Updates often include bug fixes and security patches that can enhance your system’s resilience.
Conclusion: Embracing the Safety Net of System Restore Points
System Restore Points are a powerful tool in the Windows 10 arsenal, providing a safety net for your digital life. By understanding their functionality, benefits, and management, you can effectively utilize this feature to mitigate potential issues, recover from unforeseen events, and ensure the stability of your computer. Remember, a well-managed system with regular restore points acts as a digital time machine, allowing you to rewind your computer to a previous state and regain control over your digital environment.

:max_bytes(150000):strip_icc()/007_how-to-use-system-restore-in-windows-2626131-5becbd4c46e0fb0026d887cb.png)
Closure
Thus, we hope this article has provided valuable insights into Navigating the Time Machine: Understanding and Utilizing Windows 10 System Restore Points. We hope you find this article informative and beneficial. See you in our next article!